Confession time: My Canva account used to be a hot mess. Nothing was organized. I could barely find what I was looking for—even the products I was selling seemed to get lost in the Canva shuffle. I’d spend ages searching for that perfect photo I uploaded months ago, only to give up in frustration. Sound familiar?
I knew I had to make a change. So I dove in and started figuring out systems, processes, and little hacks that have since turned my Canva into an organized, easy-to-navigate space. Now, I can find exactly what I need, when I need it. No more wasting hours digging through clutter—I’ve streamlined my workflow, and I’m here to help you do the same.
If this resonates with you and you struggle with keeping your Canva account organized, stick with me because I’m about to spill my top 5 favorite organizational hacks. These tips will help you work smarter inside Canva, so you can get back to doing what you love: selling homes, meeting clients, and making connections. Let’s dive in!
1. Use Folders (Yes, It’s Worth It!)
I know, I know—you’ve heard it a million times before. “Use folders!” And I get it, the thought of setting up folders in Canva might not sound like fun. But trust me, for real estate pros, this is an absolute game-changer.
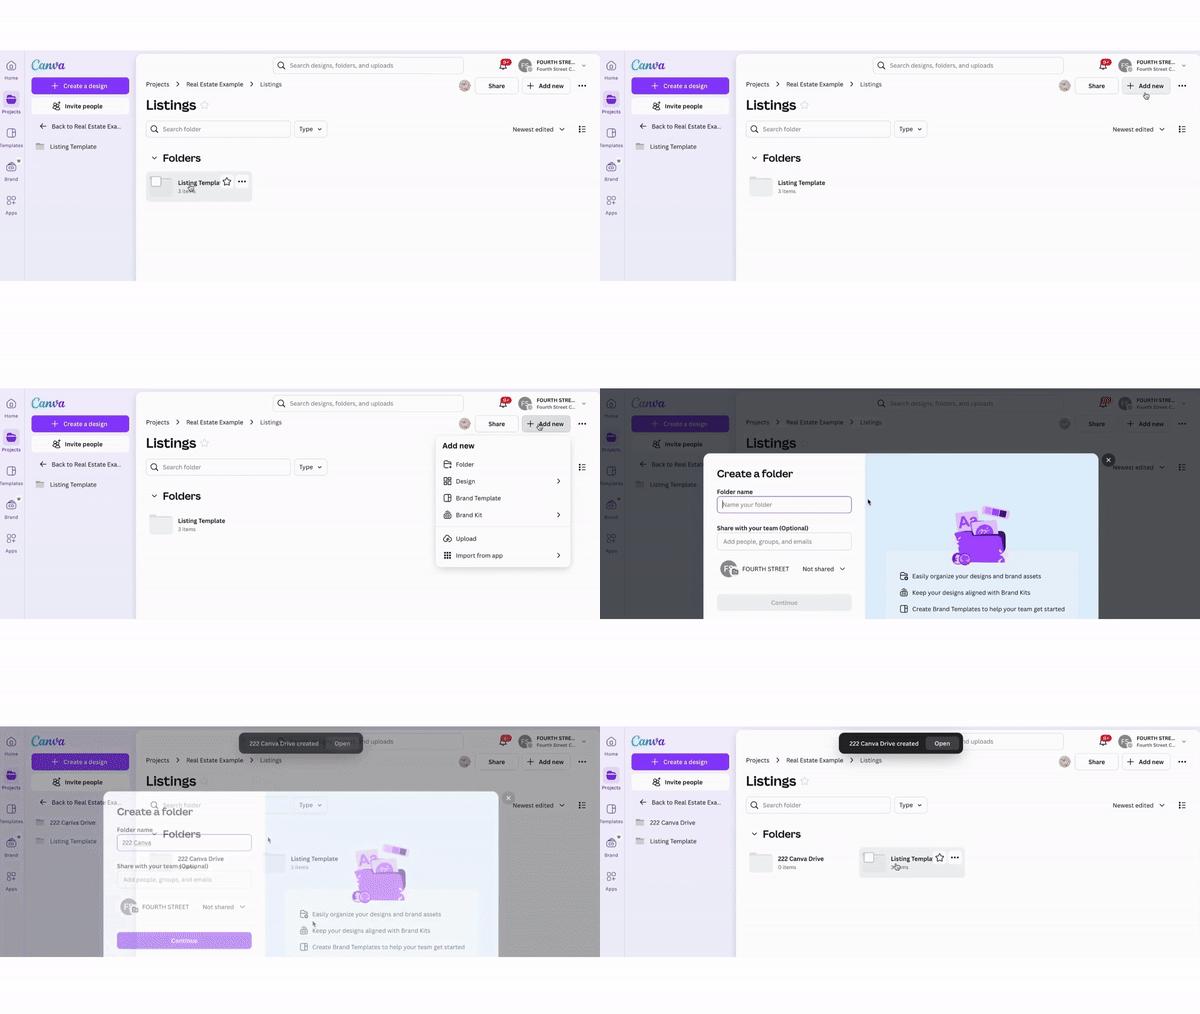
Instead of starting on the Canva homepage, head straight to the Projects tab on the left-hand side, then click on Folders. Here’s where the magic happens. Organize your business into folders that make sense for you—think Listings, Brand Photos, and Social Media. You’ll thank yourself later, especially when your business grows, and you need to share files with contractors or team members. Everything will be neat, organized, and ready to go!
For example, under Listings, create a master template folder that never gets altered. When you get a new listing, copy that template into a new folder (say, 222 Canva Drive), and all your assets will be ready to customize without messing with your originals. It’s efficient, easy, and a huge time-saver!
2. Stop Using the Uploads Tab for Everything
I was once guilty of this: uploading every file into Canva’s Uploads tab. The result? A chaotic jumble of files that was impossible to sift through.
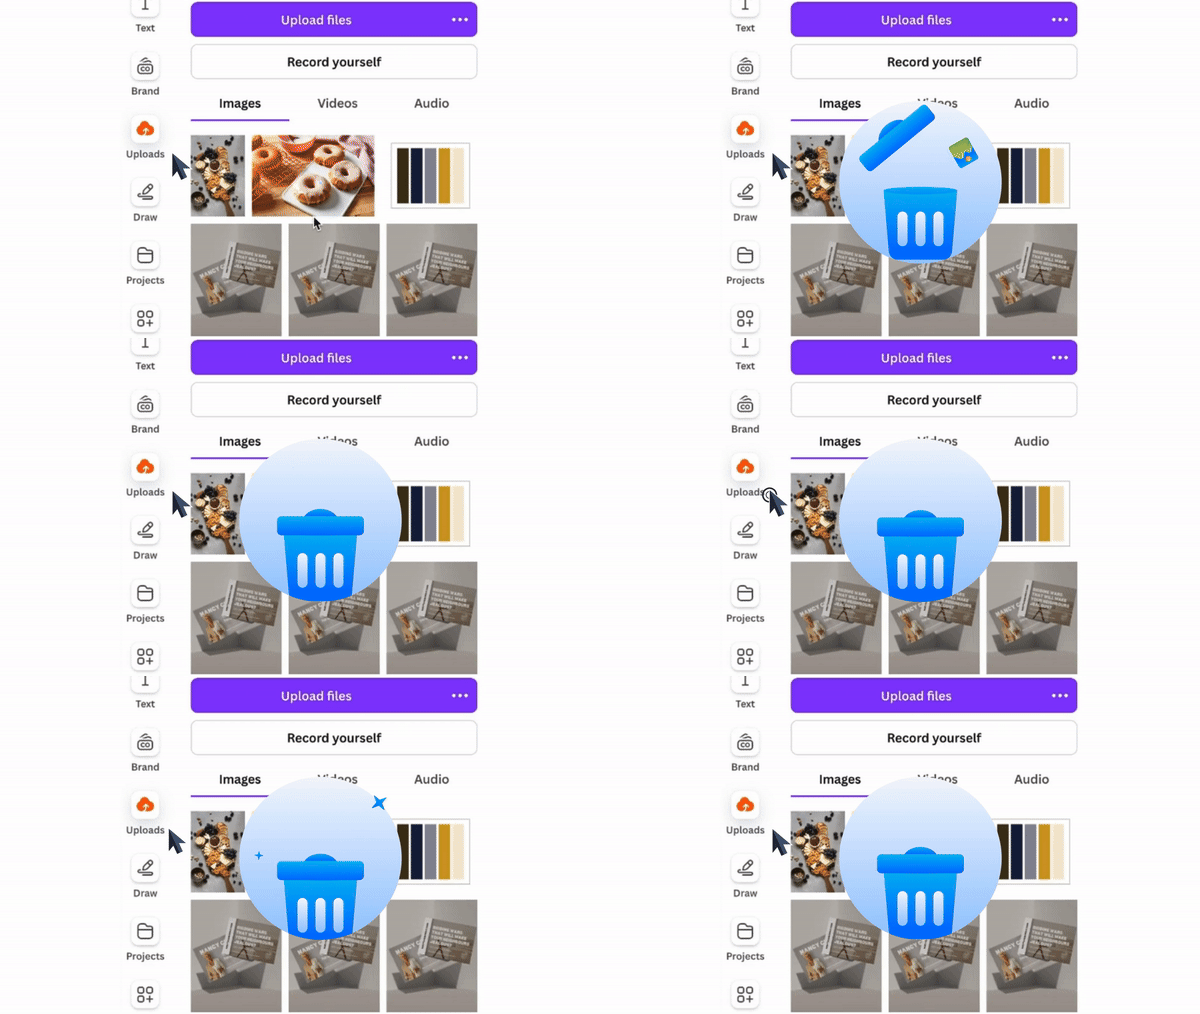
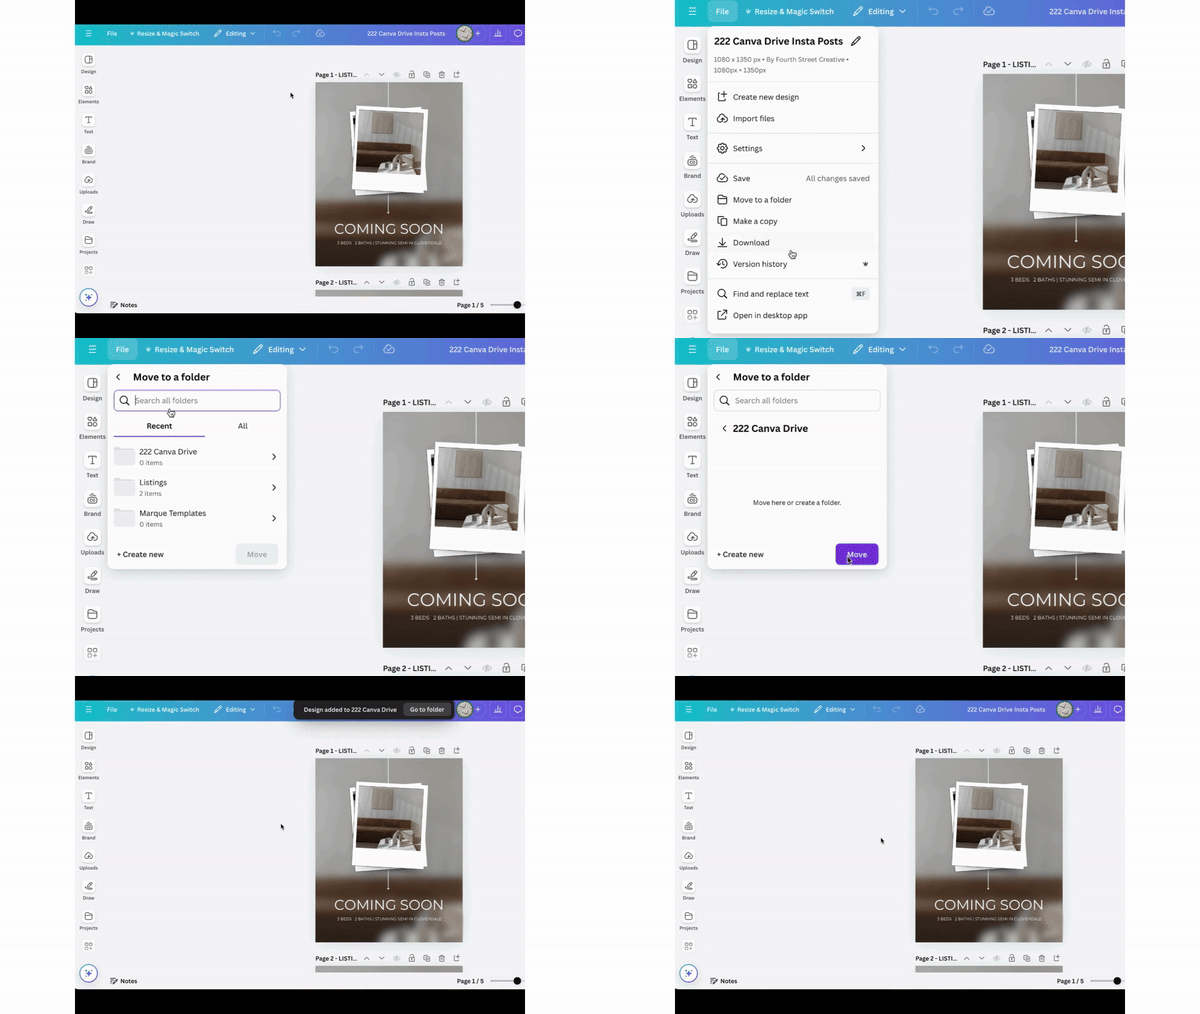
Instead, I now upload everything into organized folders within the Projects section. For example, when it’s time to add listing photos, I don’t dump them into the generic uploads folder. I upload them directly into a specific folder like 222 Canva Drive. This keeps everything neat and accessible when I’m working on designs, and I can easily delete any unnecessary uploads afterward.
3. Tag Your Favorite Files
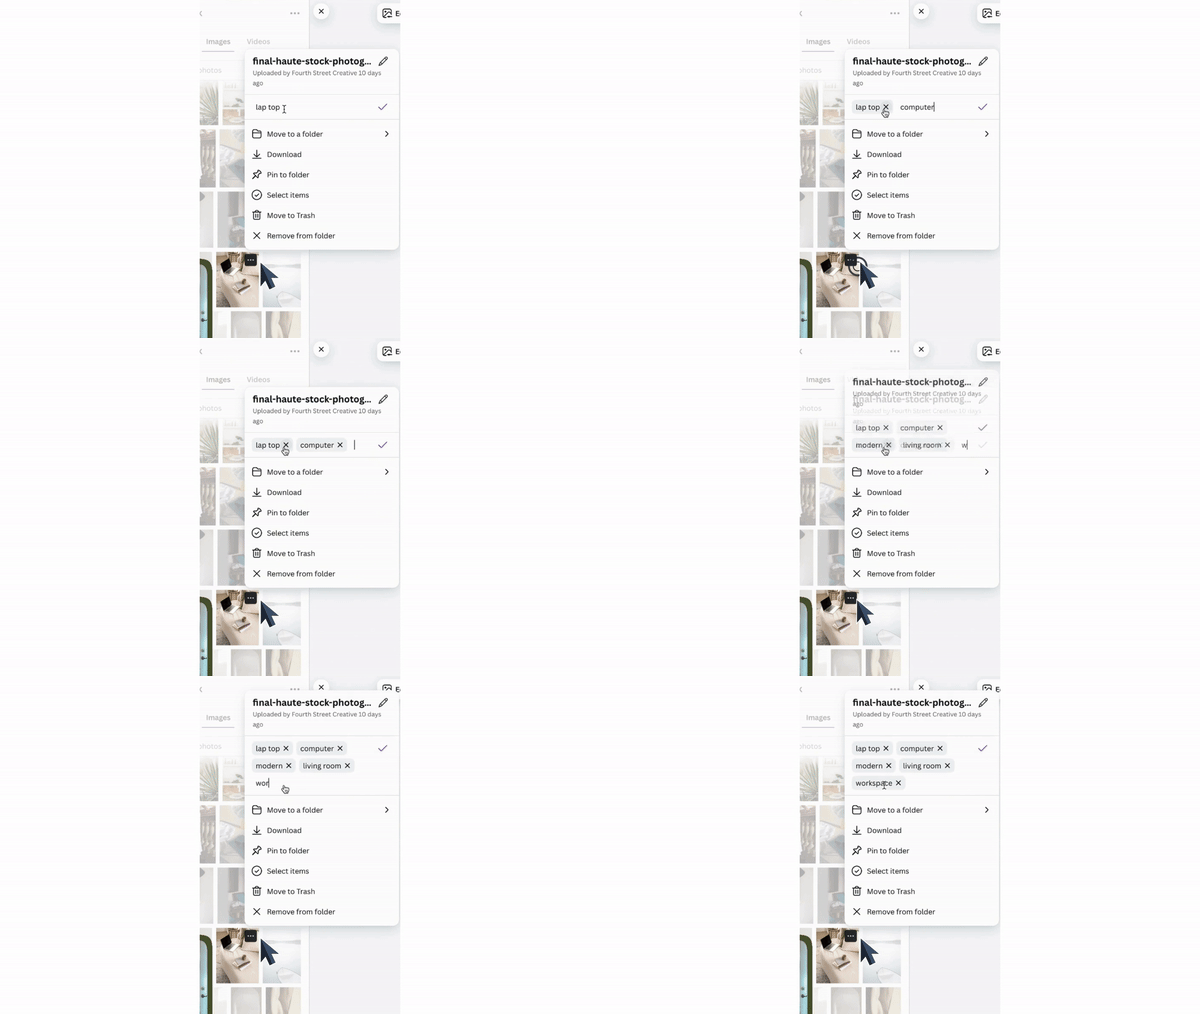
Tagging is a brilliant hack for quickly finding your go-to assets. Let’s say you’ve found a perfect stock photo of a sleek modern workspace that you’ll definitely want to use again. Simply click on the three dots, select Tags, and start tagging with terms like “workspace,” “modern,” “laptop,” and whatever else you’ll remember when searching for it later. Now, when you type those tags into Canva’s search bar, your favorite images will appear right where you need them. No more endless scrolling!
4. Star Your Favorite Elements
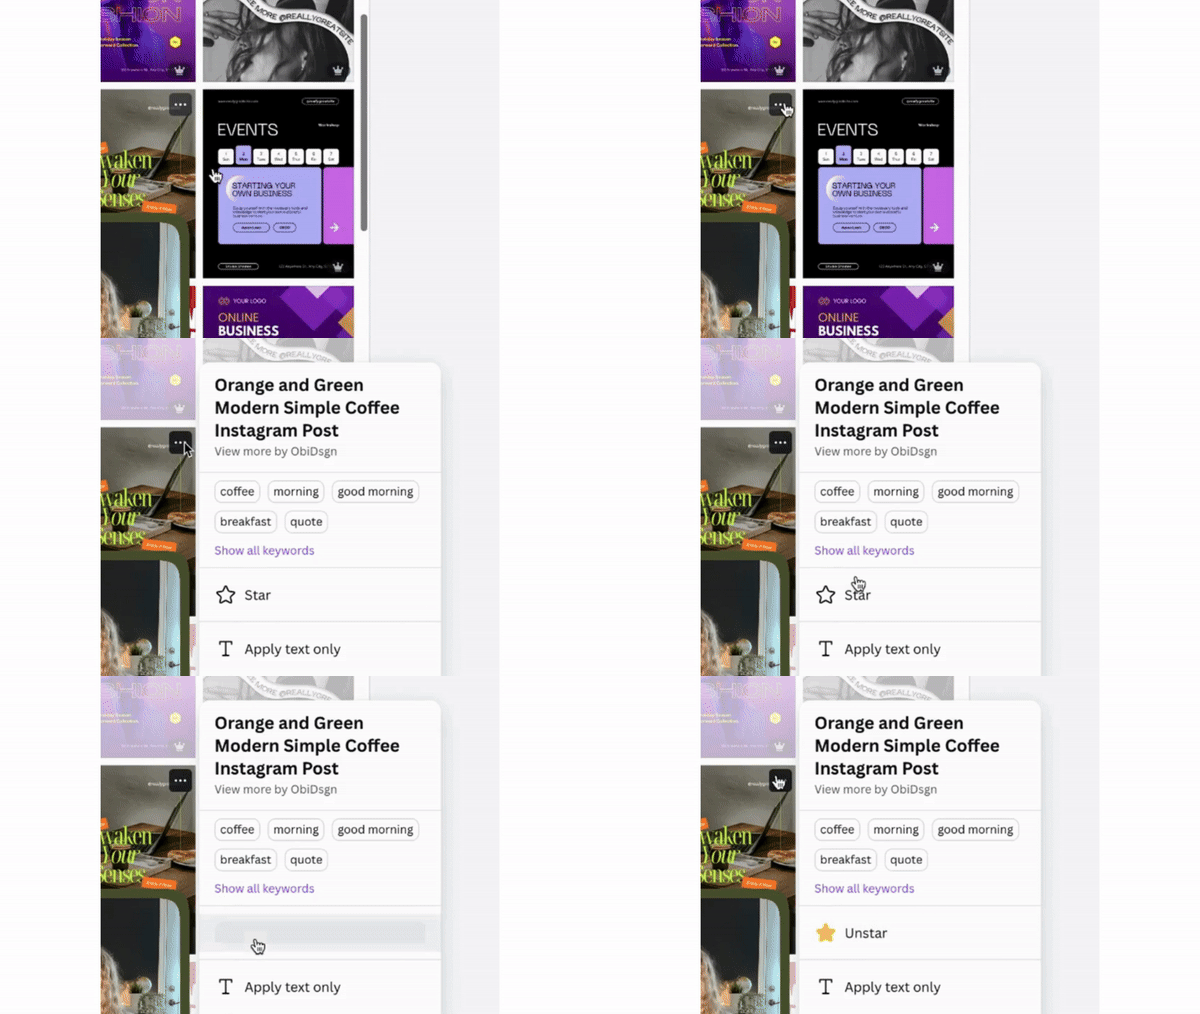
Sometimes, you come across that one perfect icon or template that you know you’ll use again and again. Instead of searching for it every time, star it. Whether it’s an icon for your feature sheets or a favorite social media template, starring keeps all your faves in one easy-to-access folder. Just click the three dots on the element, hit Star, and it’ll be waiting for you in your Starred folder next time you need it. This feature works for everything from templates to photos to icons.
5. Make the Most of Canva’s Brand Kit
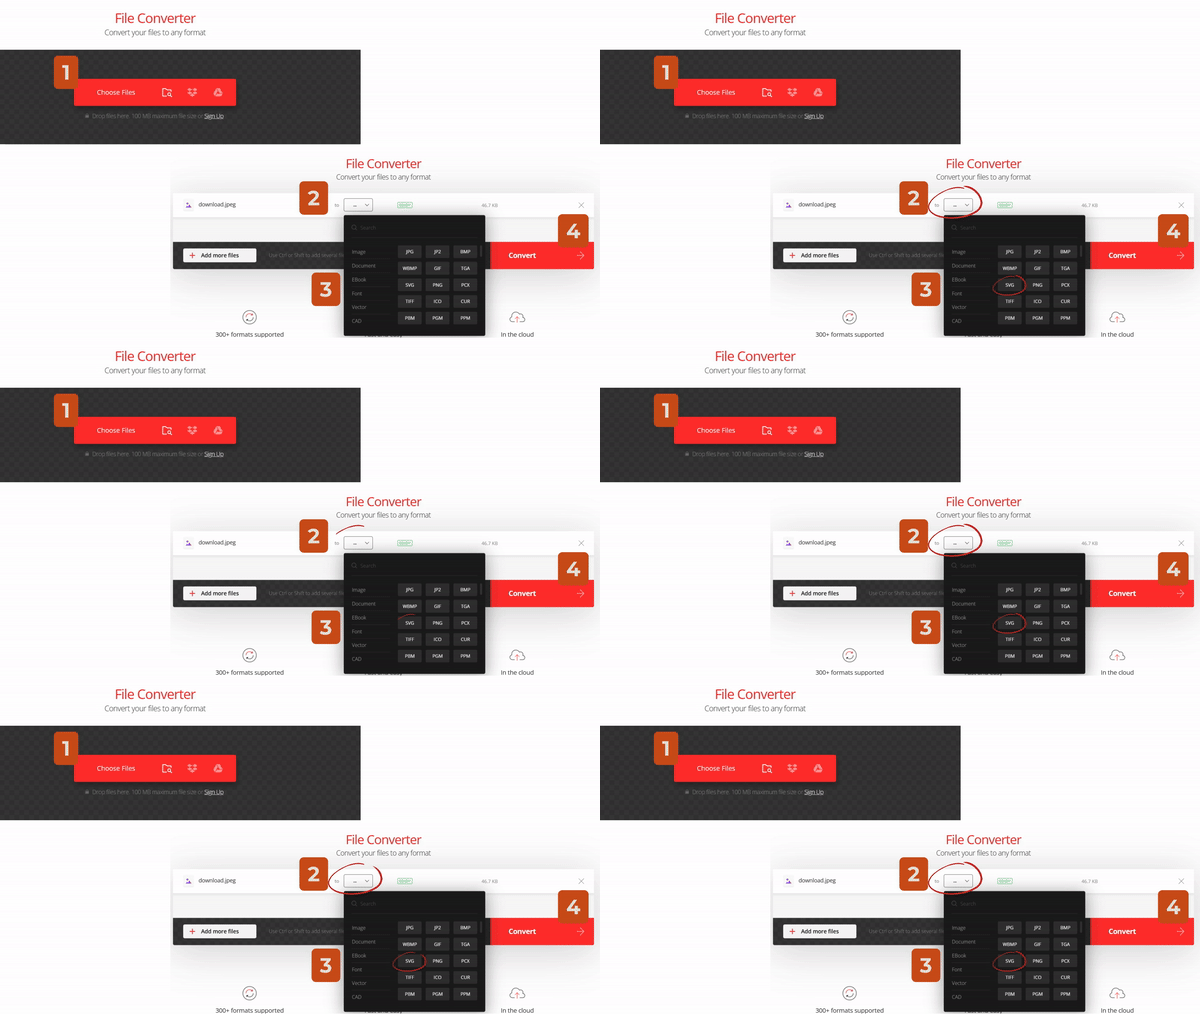
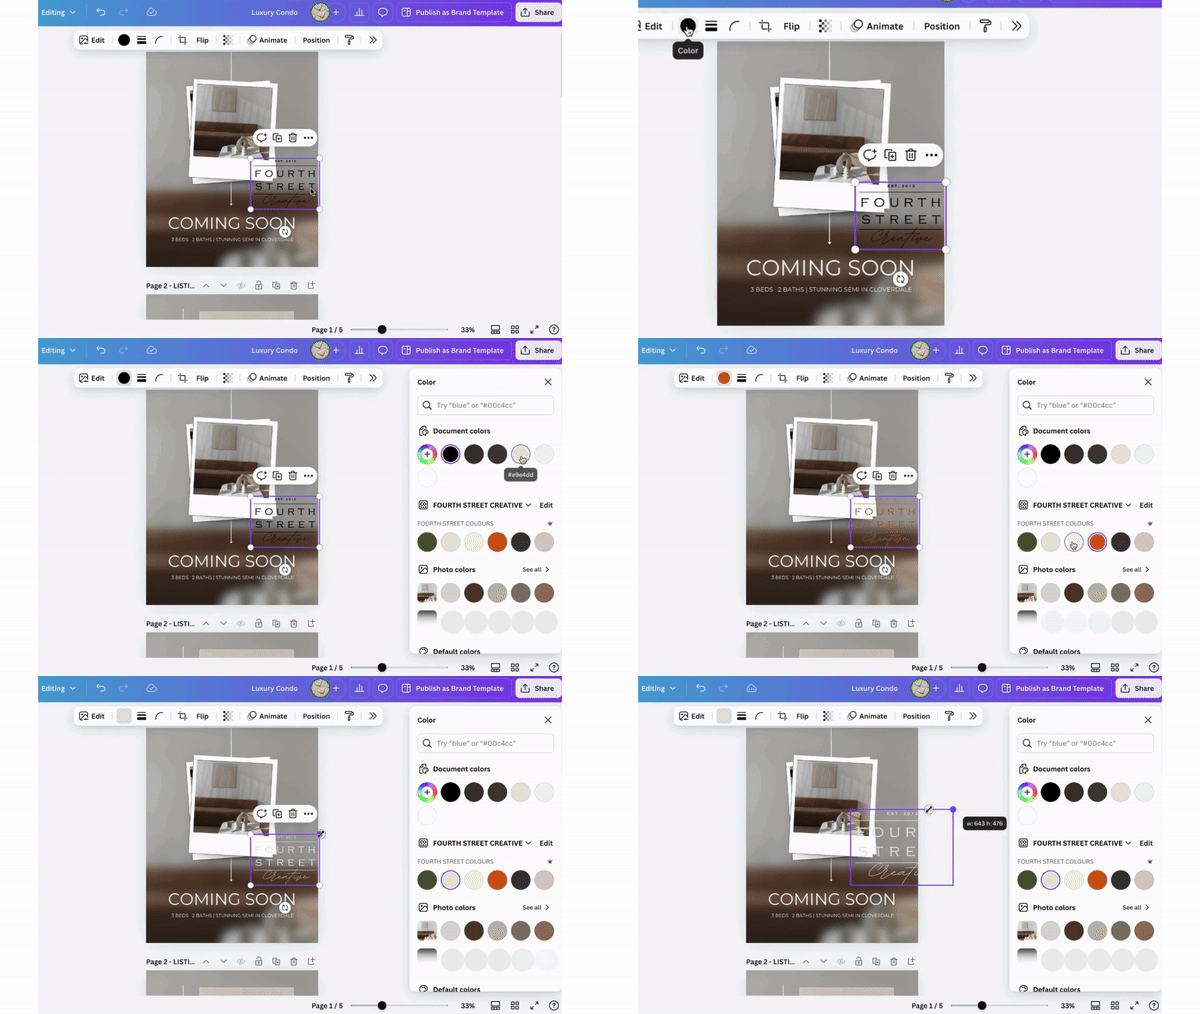
If you aren’t using Canva’s Brand Kit, you’re missing out! This feature lets you store every variation of your logo, your brand colors, and your fonts all in one place. But here’s my secret hack: Don’t just upload your logo as a PNG file—convert it to an SVG file. PNGs aren’t scalable, and you can’t change their color in Canva. By converting to SVG (using a free tool like Convertio), your logo becomes scalable and customizable. You can resize it without losing quality and change its color on the fly. Game changer, right?
Bonus Tip: Use Your Brand Kit’s Voice Feature
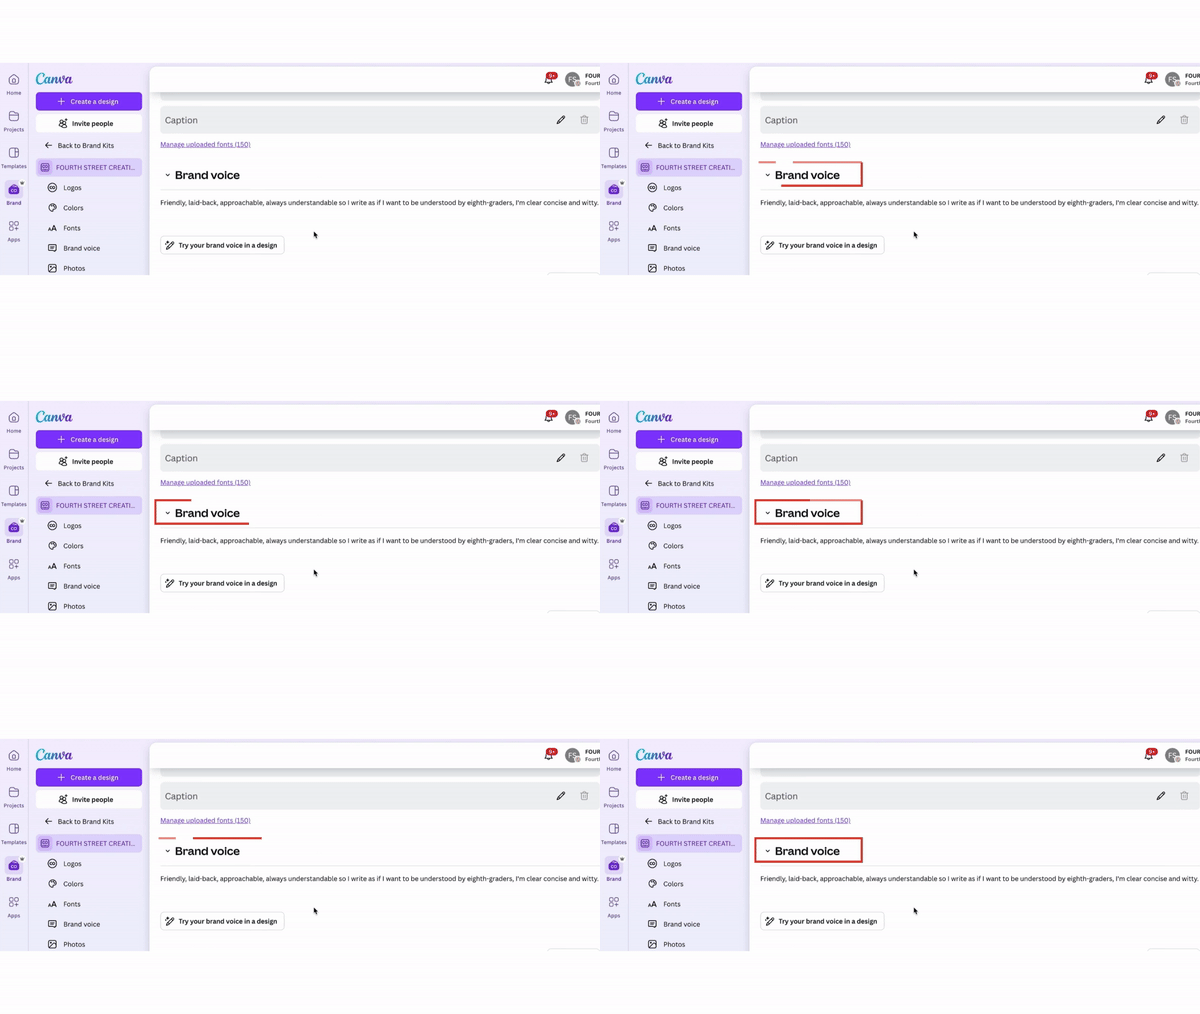
Canva’s Brand Kit now allows you to save your brand’s voice! This AI-powered tool can even help you create captions in your brand voice with just the click of a button. If you’re a pro user, this feature is gold. It ensures your messaging stays consistent, making copywriting easier and faster.
And there you have it—my top 5 Canva organizational hacks that will save you time, reduce frustration, and help you stay focused on what you do best. If you’ve been feeling overwhelmed by Canva chaos, give these tips a try and watch your workflow transform.
What about you? Got any favorite Canva hacks? Let me know in the comments—I’d love to hear what’s working for you. Happy designing!


