Not a graphic designer? Can’t afford one? More of a DIY’er and want to design your own killer visual identity? Whatever your reason or skill level, Canva is THE design tool you’ll love getting to know this year. It makes designing things like flyers, social media posts and just about anything your business will need easy, timely and fun with countless done for you options, and tools that mean fantastic designs right at your fingertips whenever you need them. Here’s the delicious cherry on top … it’s free. To help you get started, I’ve outlined my 10 step process for creating stunning visual content on Canva. Let’s do this!
For the sake of this tutorial, I’ll be using one of our Property Sheet Templates – GRAB YOURS HERE
one | CHOOSE A DESIGN
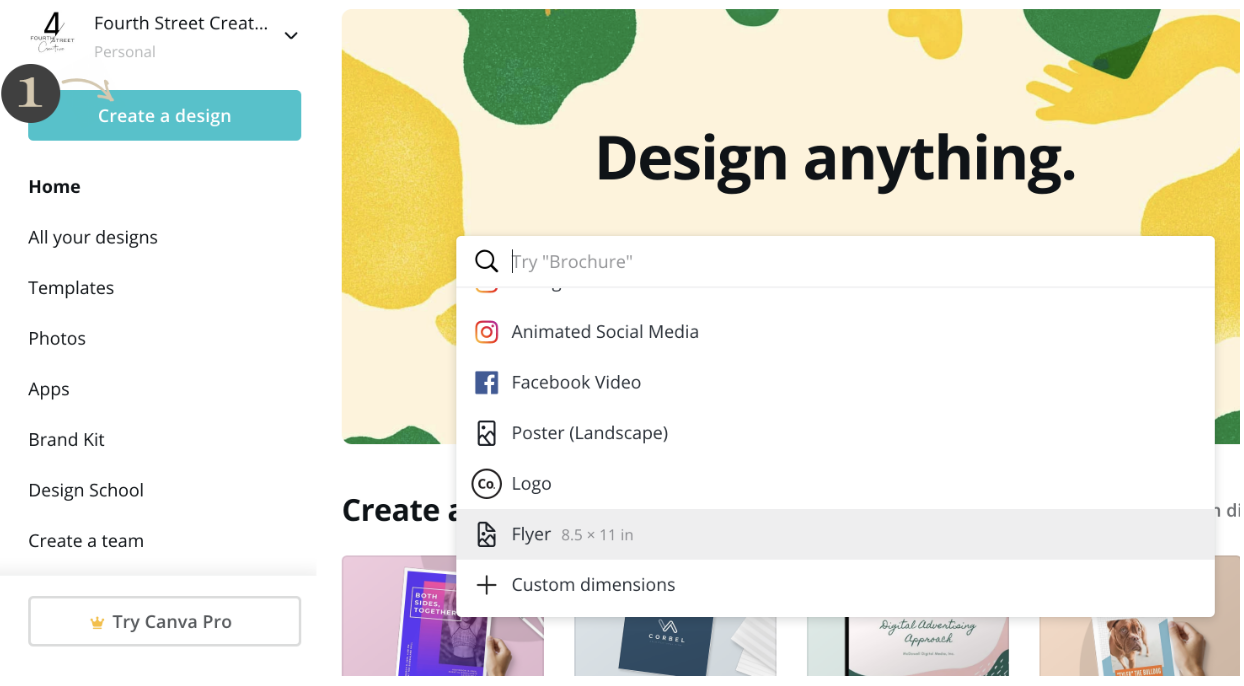
Decide what you want to create
two | CHOOSE YOUR TEMPLATES OR OPEN YOUR FILE
Canva has countless templates to choose from or simply open your purchased template from Fourth Street Creative and head on over to the next step.

three | IMPORT YOUR PHOTOS
Head over to the uploads tab located in the left-side panel and upload listing or project photos from your computer.

four | DRAG AND DROP
Once your photos are uploaded grab the photos one by one and slide them into image boxes.

five | CHOOSE YOUR BRAND FONTS
If you have your own brand fonts that you use regularly throughout your marketing, select them by clicking on any type in the design with your mouse and choosing from the dropdown menu.

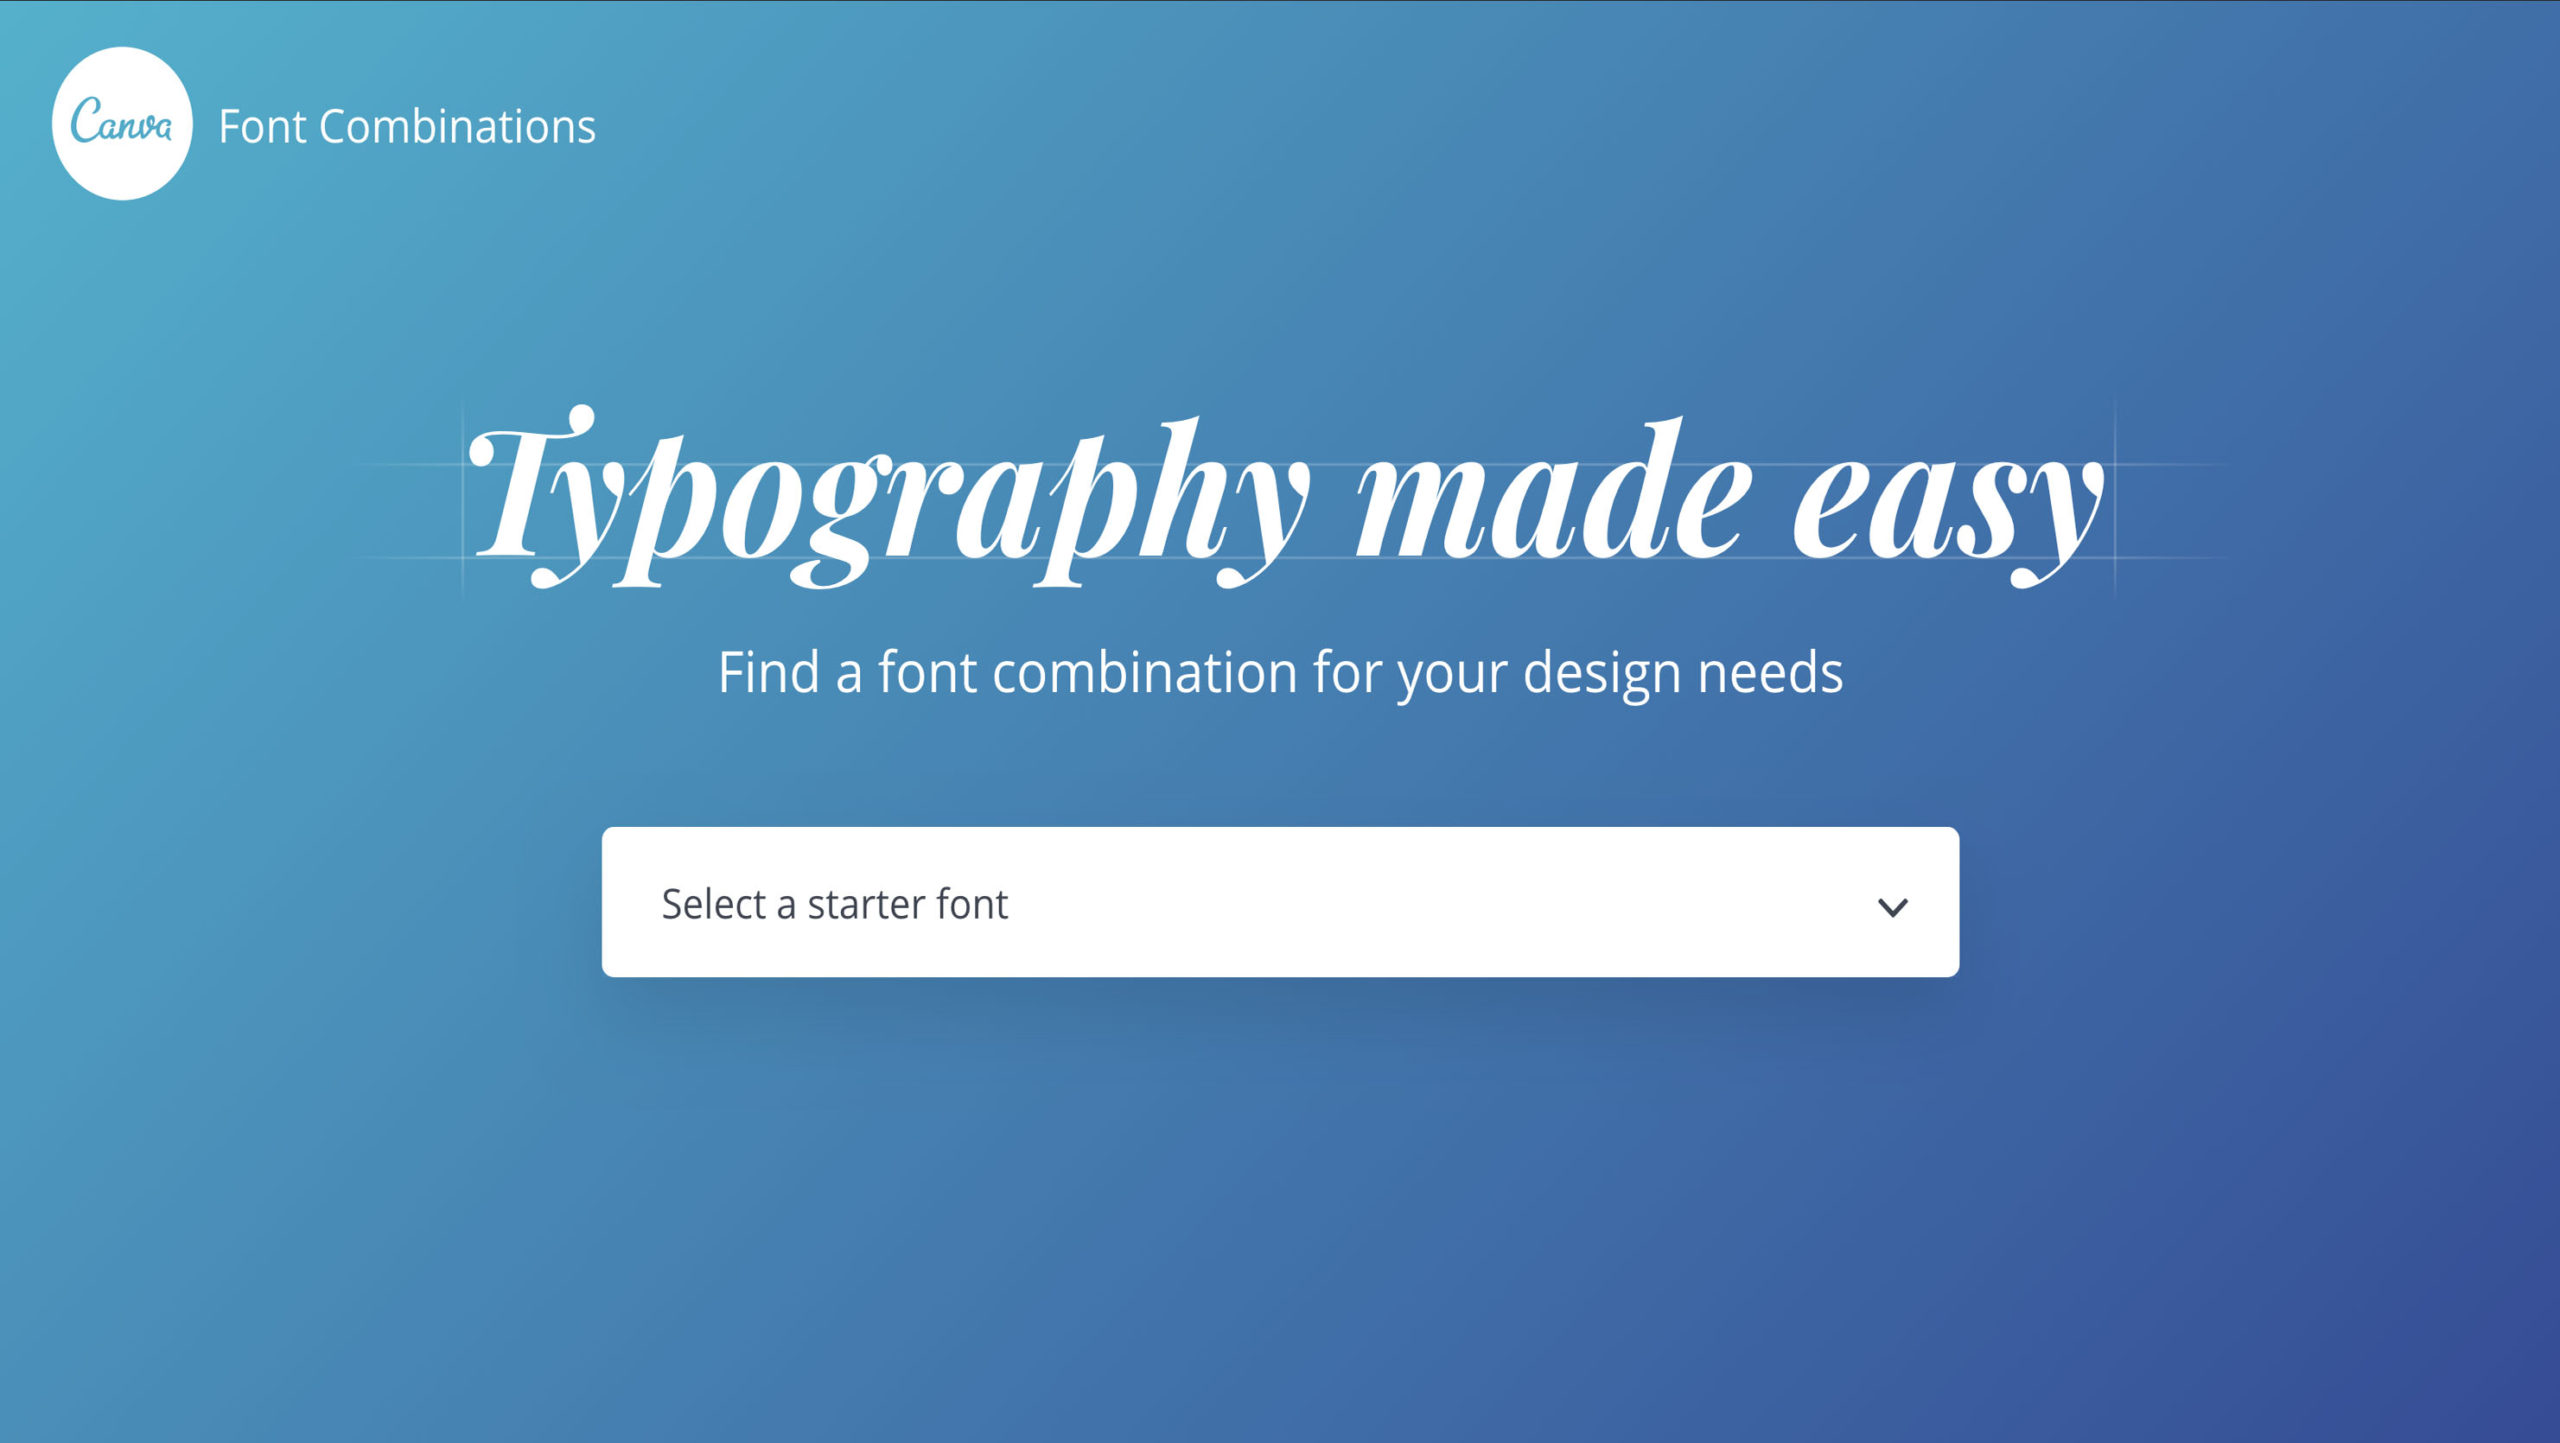
Need help with font pairing? Canva has an amazing tool to make sure you always have complimentary font pairing.
six | CHANGE COLOURS
If you have a brand colour already established and want to use it in this design simply click any colour box with your mouse and choose a colour from the side panel. If you have your brand colour’s hex code simply enter it in the search box.

Pro Tip: Try matching the design colour to one found throughout the home. Matching design colour to home elements can really make your listing pop!
seven | CUSTOMIZE INFORMATION
Double click on any type, highlight and delete text to enter your own content. Use the top panel to edit elements such as spacing, weight, alignment and colour.

eight | ADD OR EDIT DESIGN ELEMENTS
Need a bigger photo area? Or more room for text? Anything can be changed to suit your needs. Simply click on any design element to move or resize.
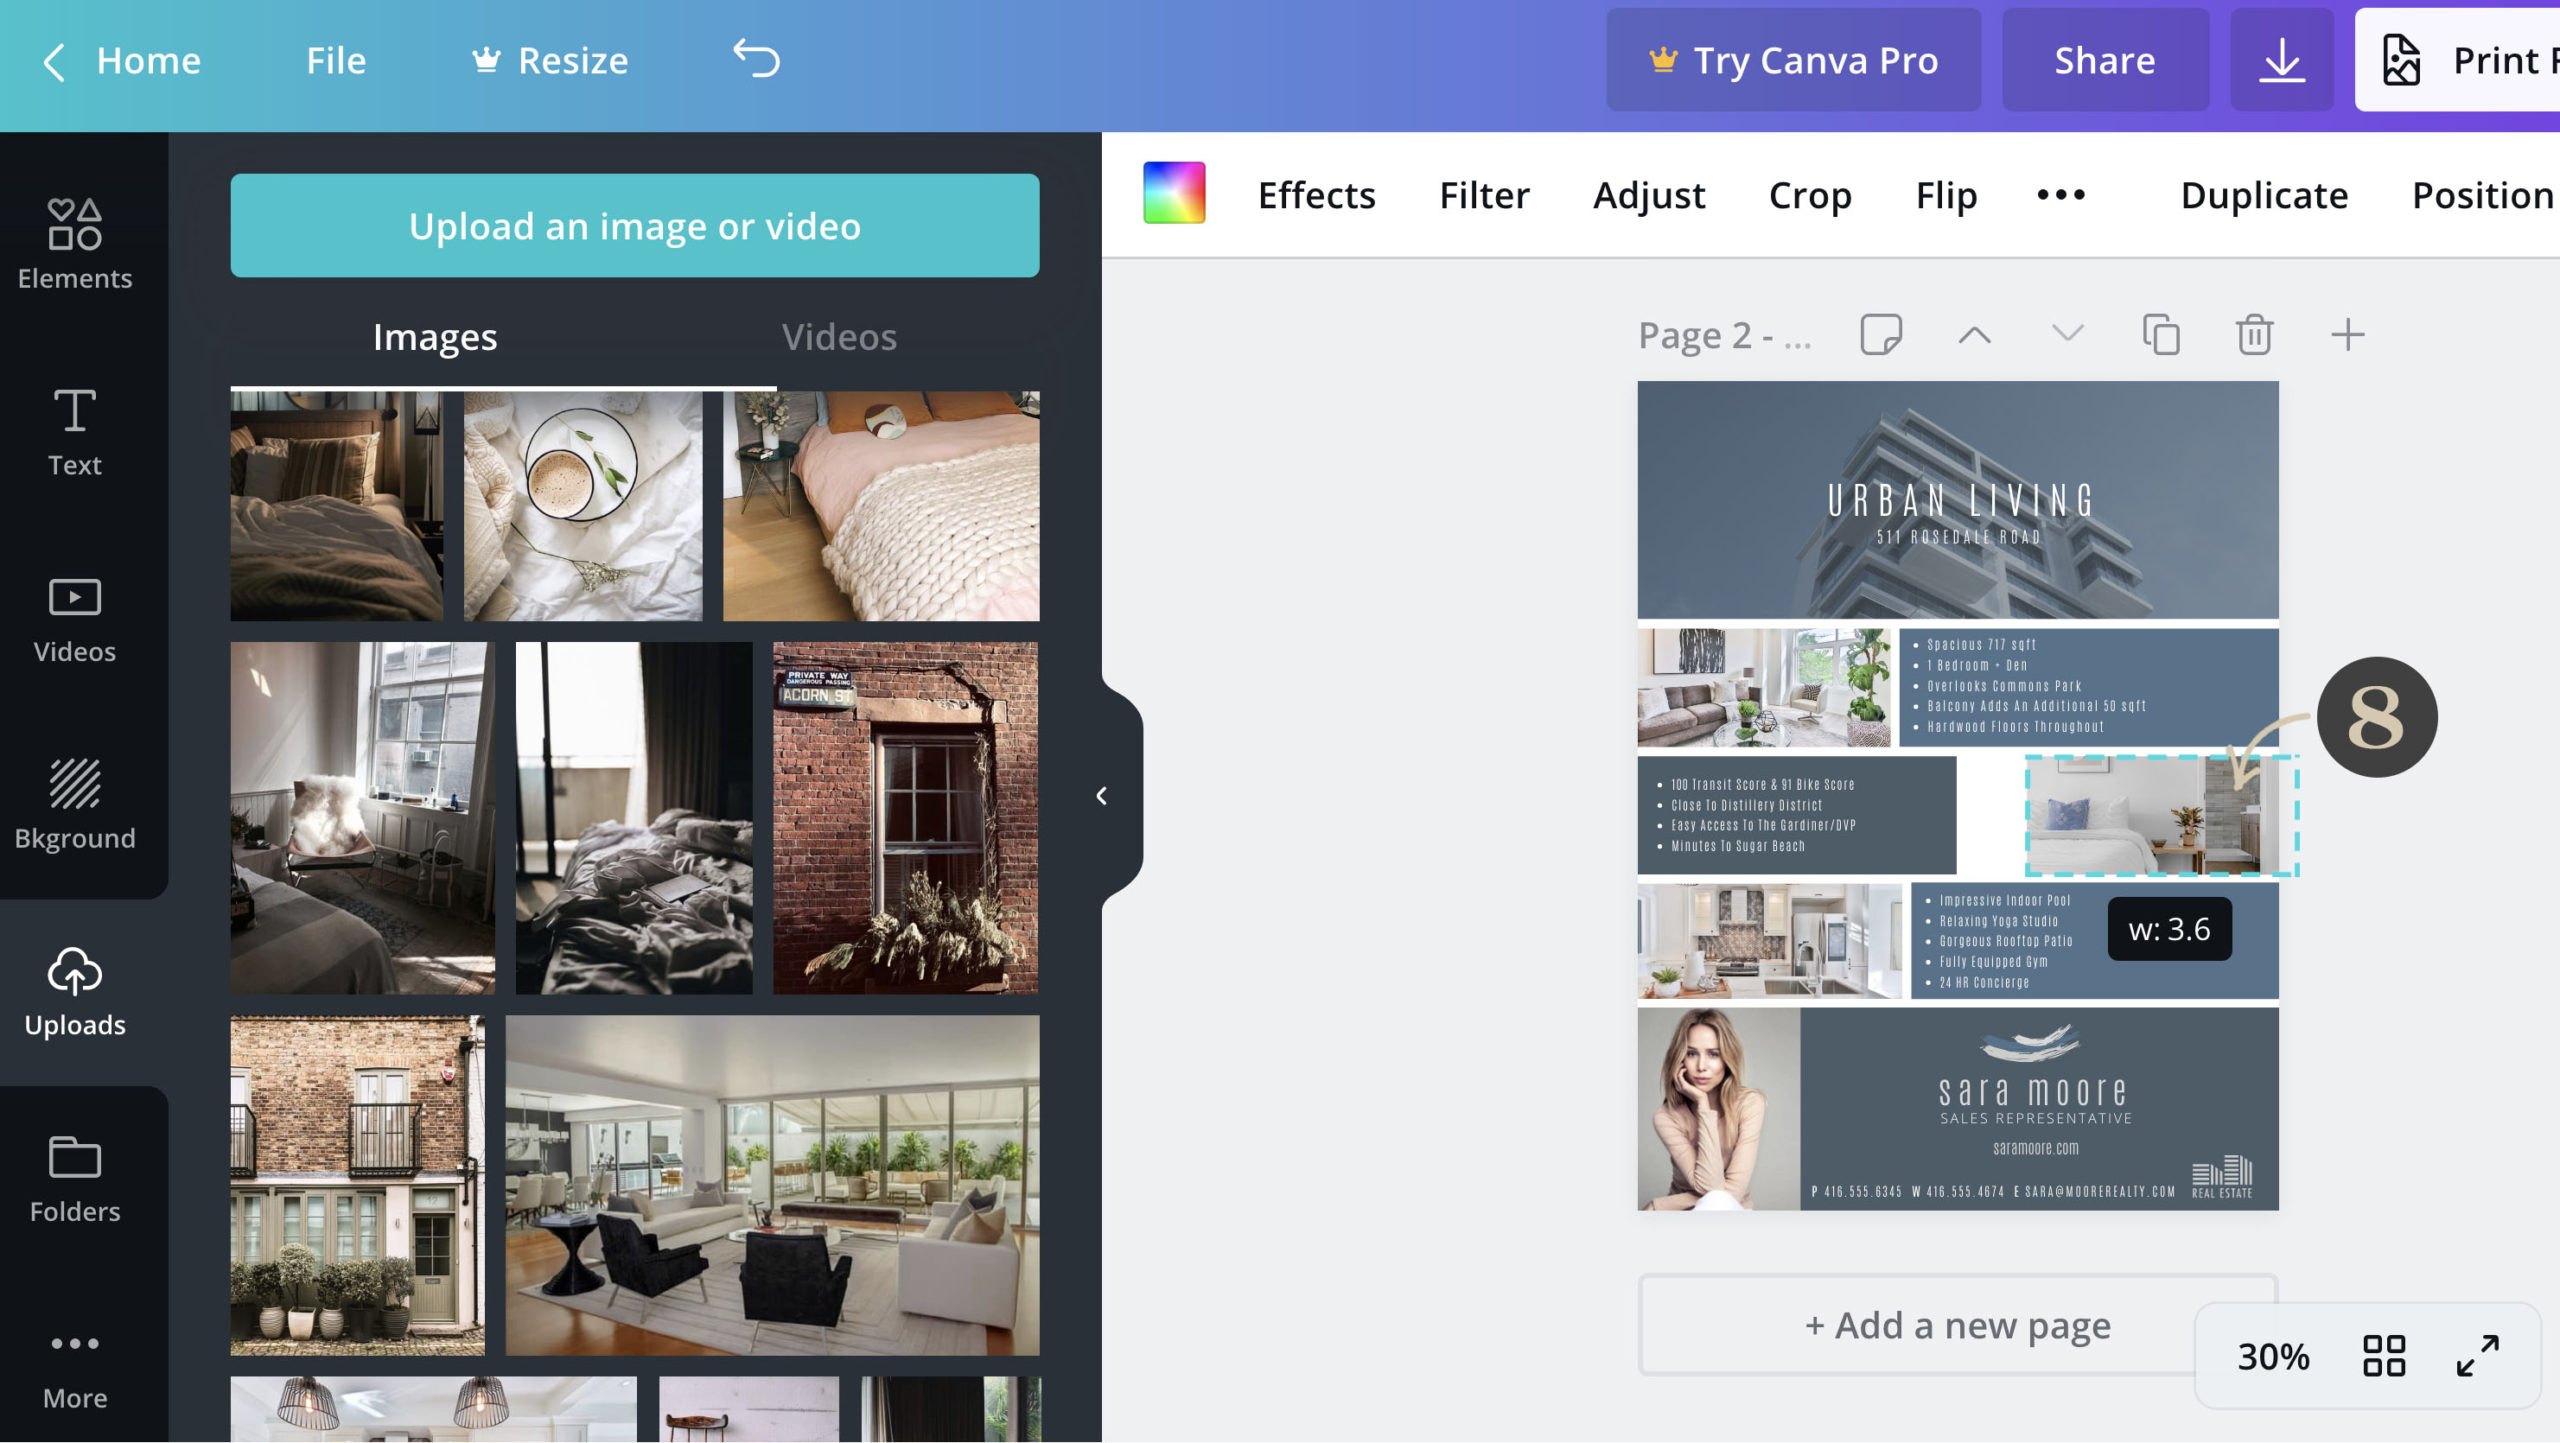
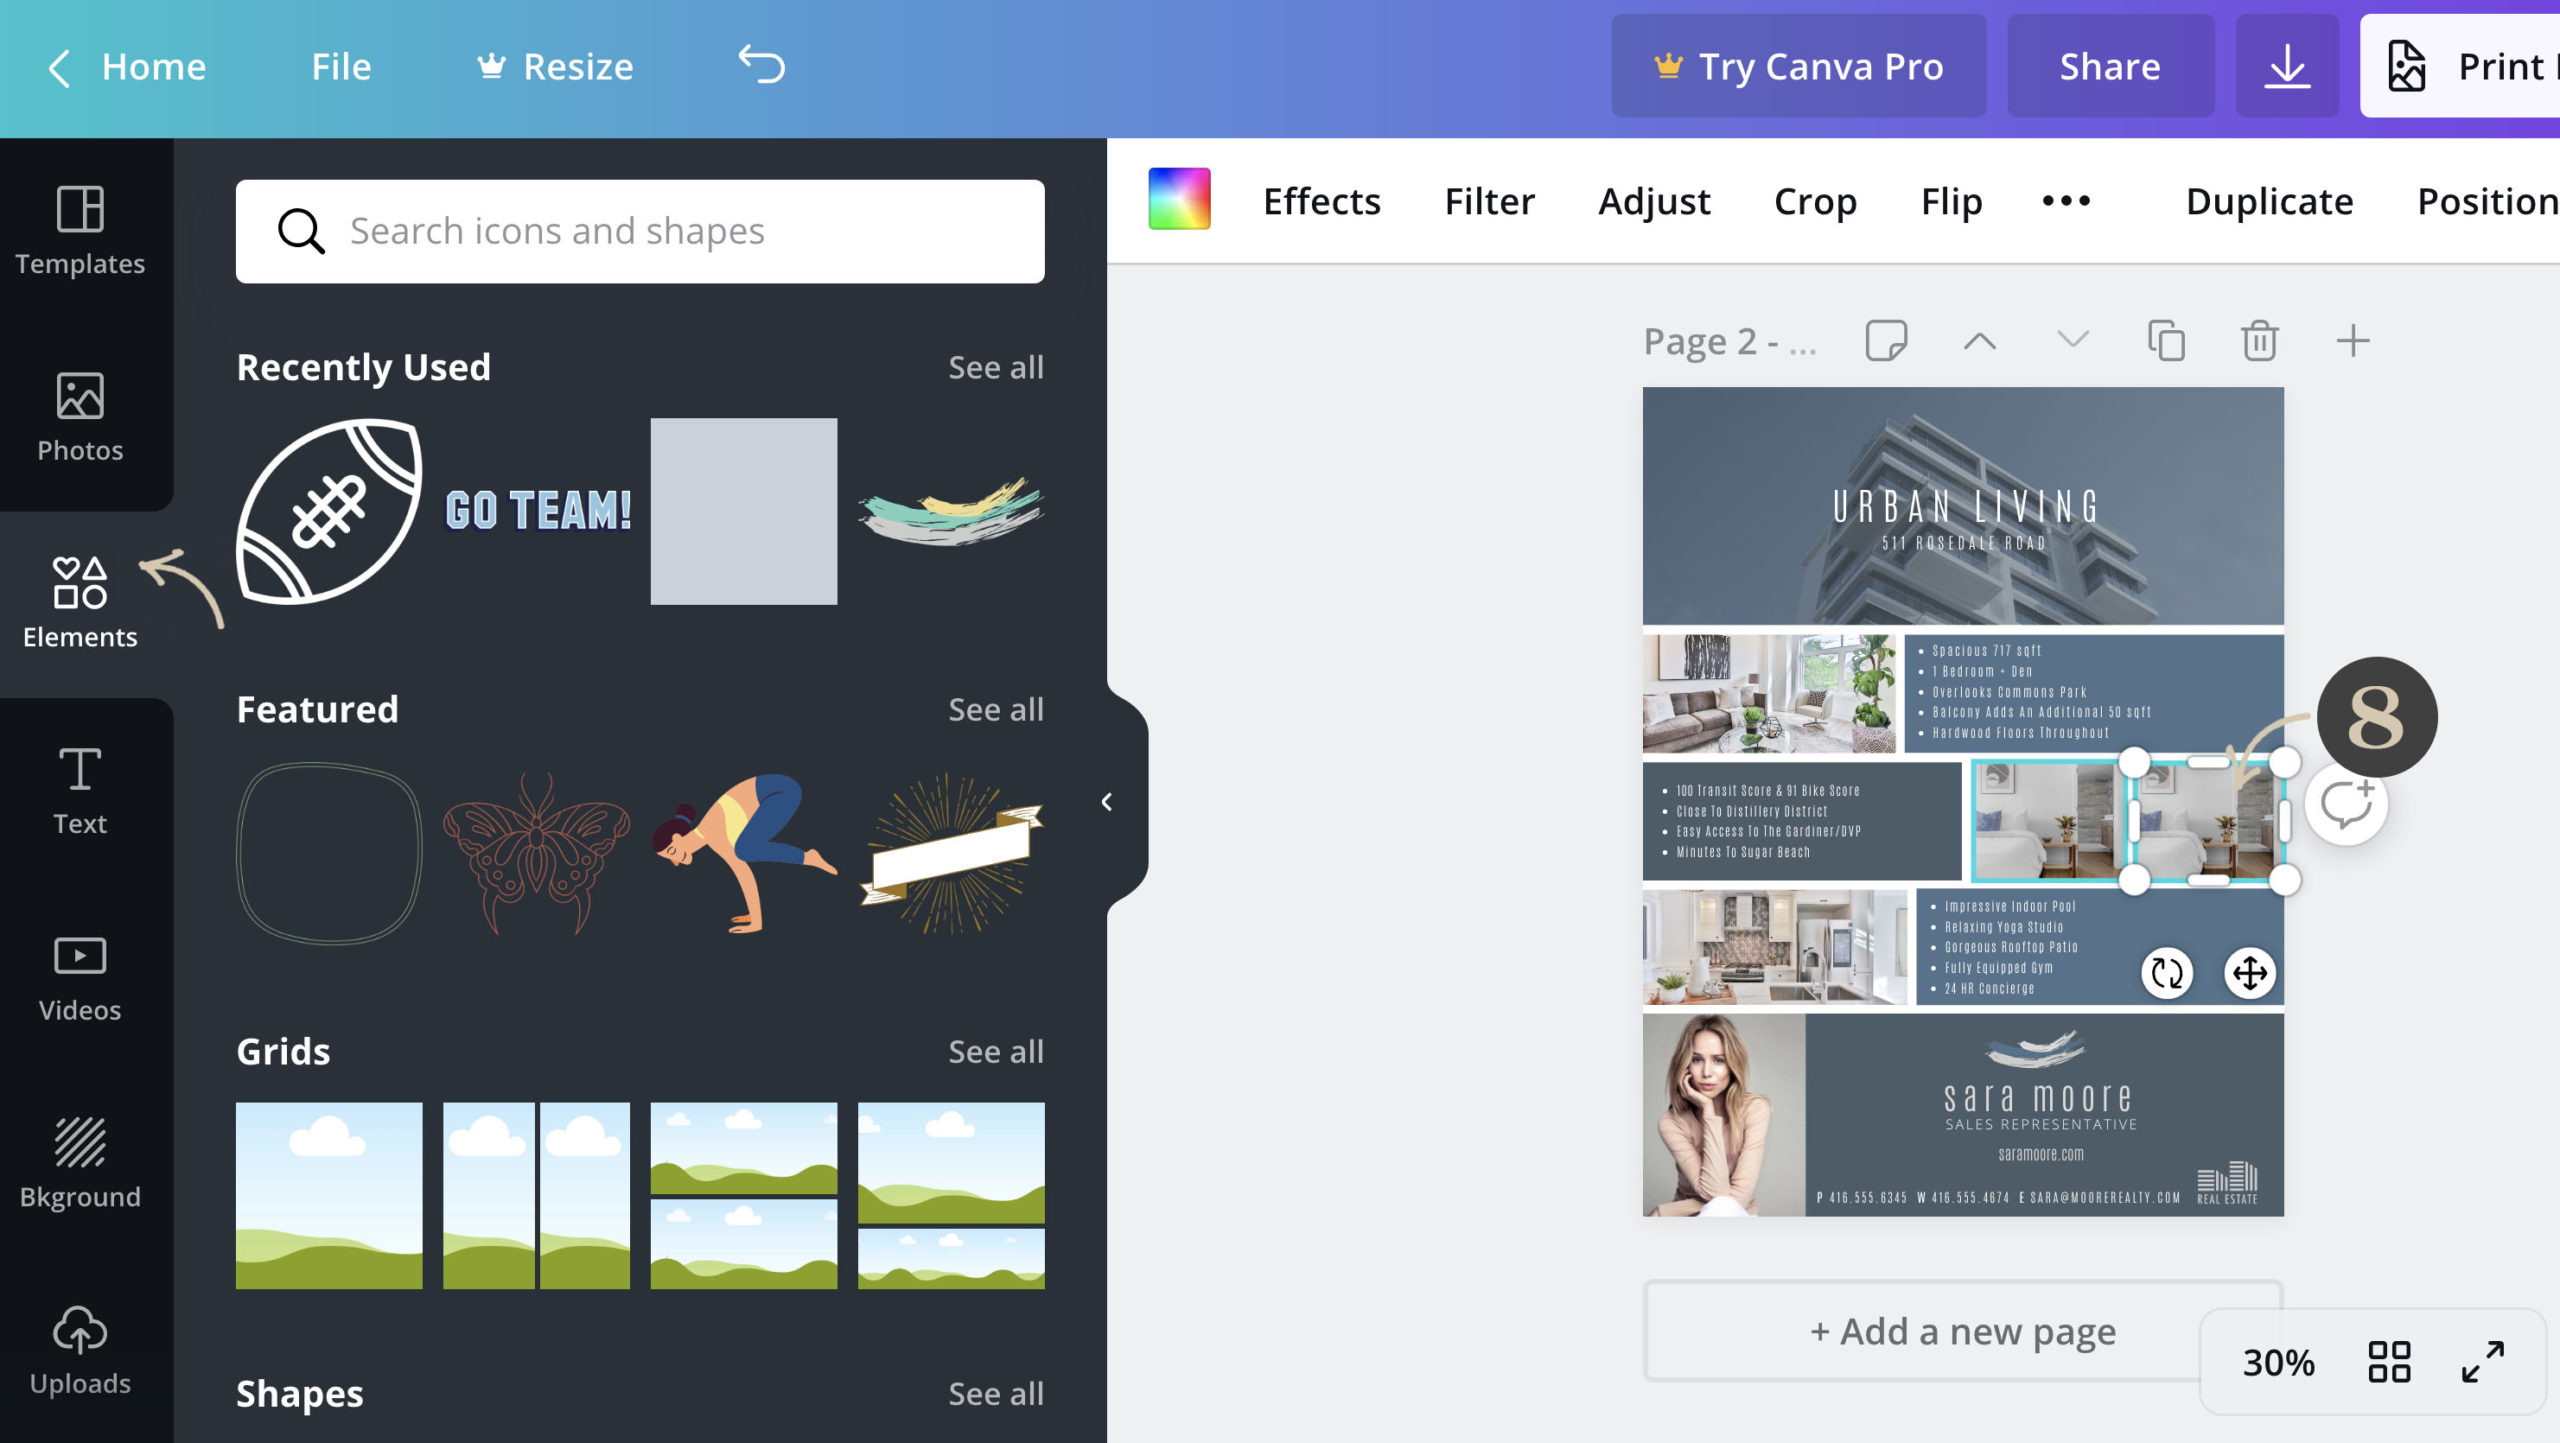
Want to add something like an icon or another photo? You can do that by heading over to the side panel under elements or adding another photo box by copying (mac Command + C or windows Control + C ) and pasting (Mac Command + V or Windows Control + V) directly into your design.
nine | CUSTOMIZE PERSONAL INFORMATION BANNER
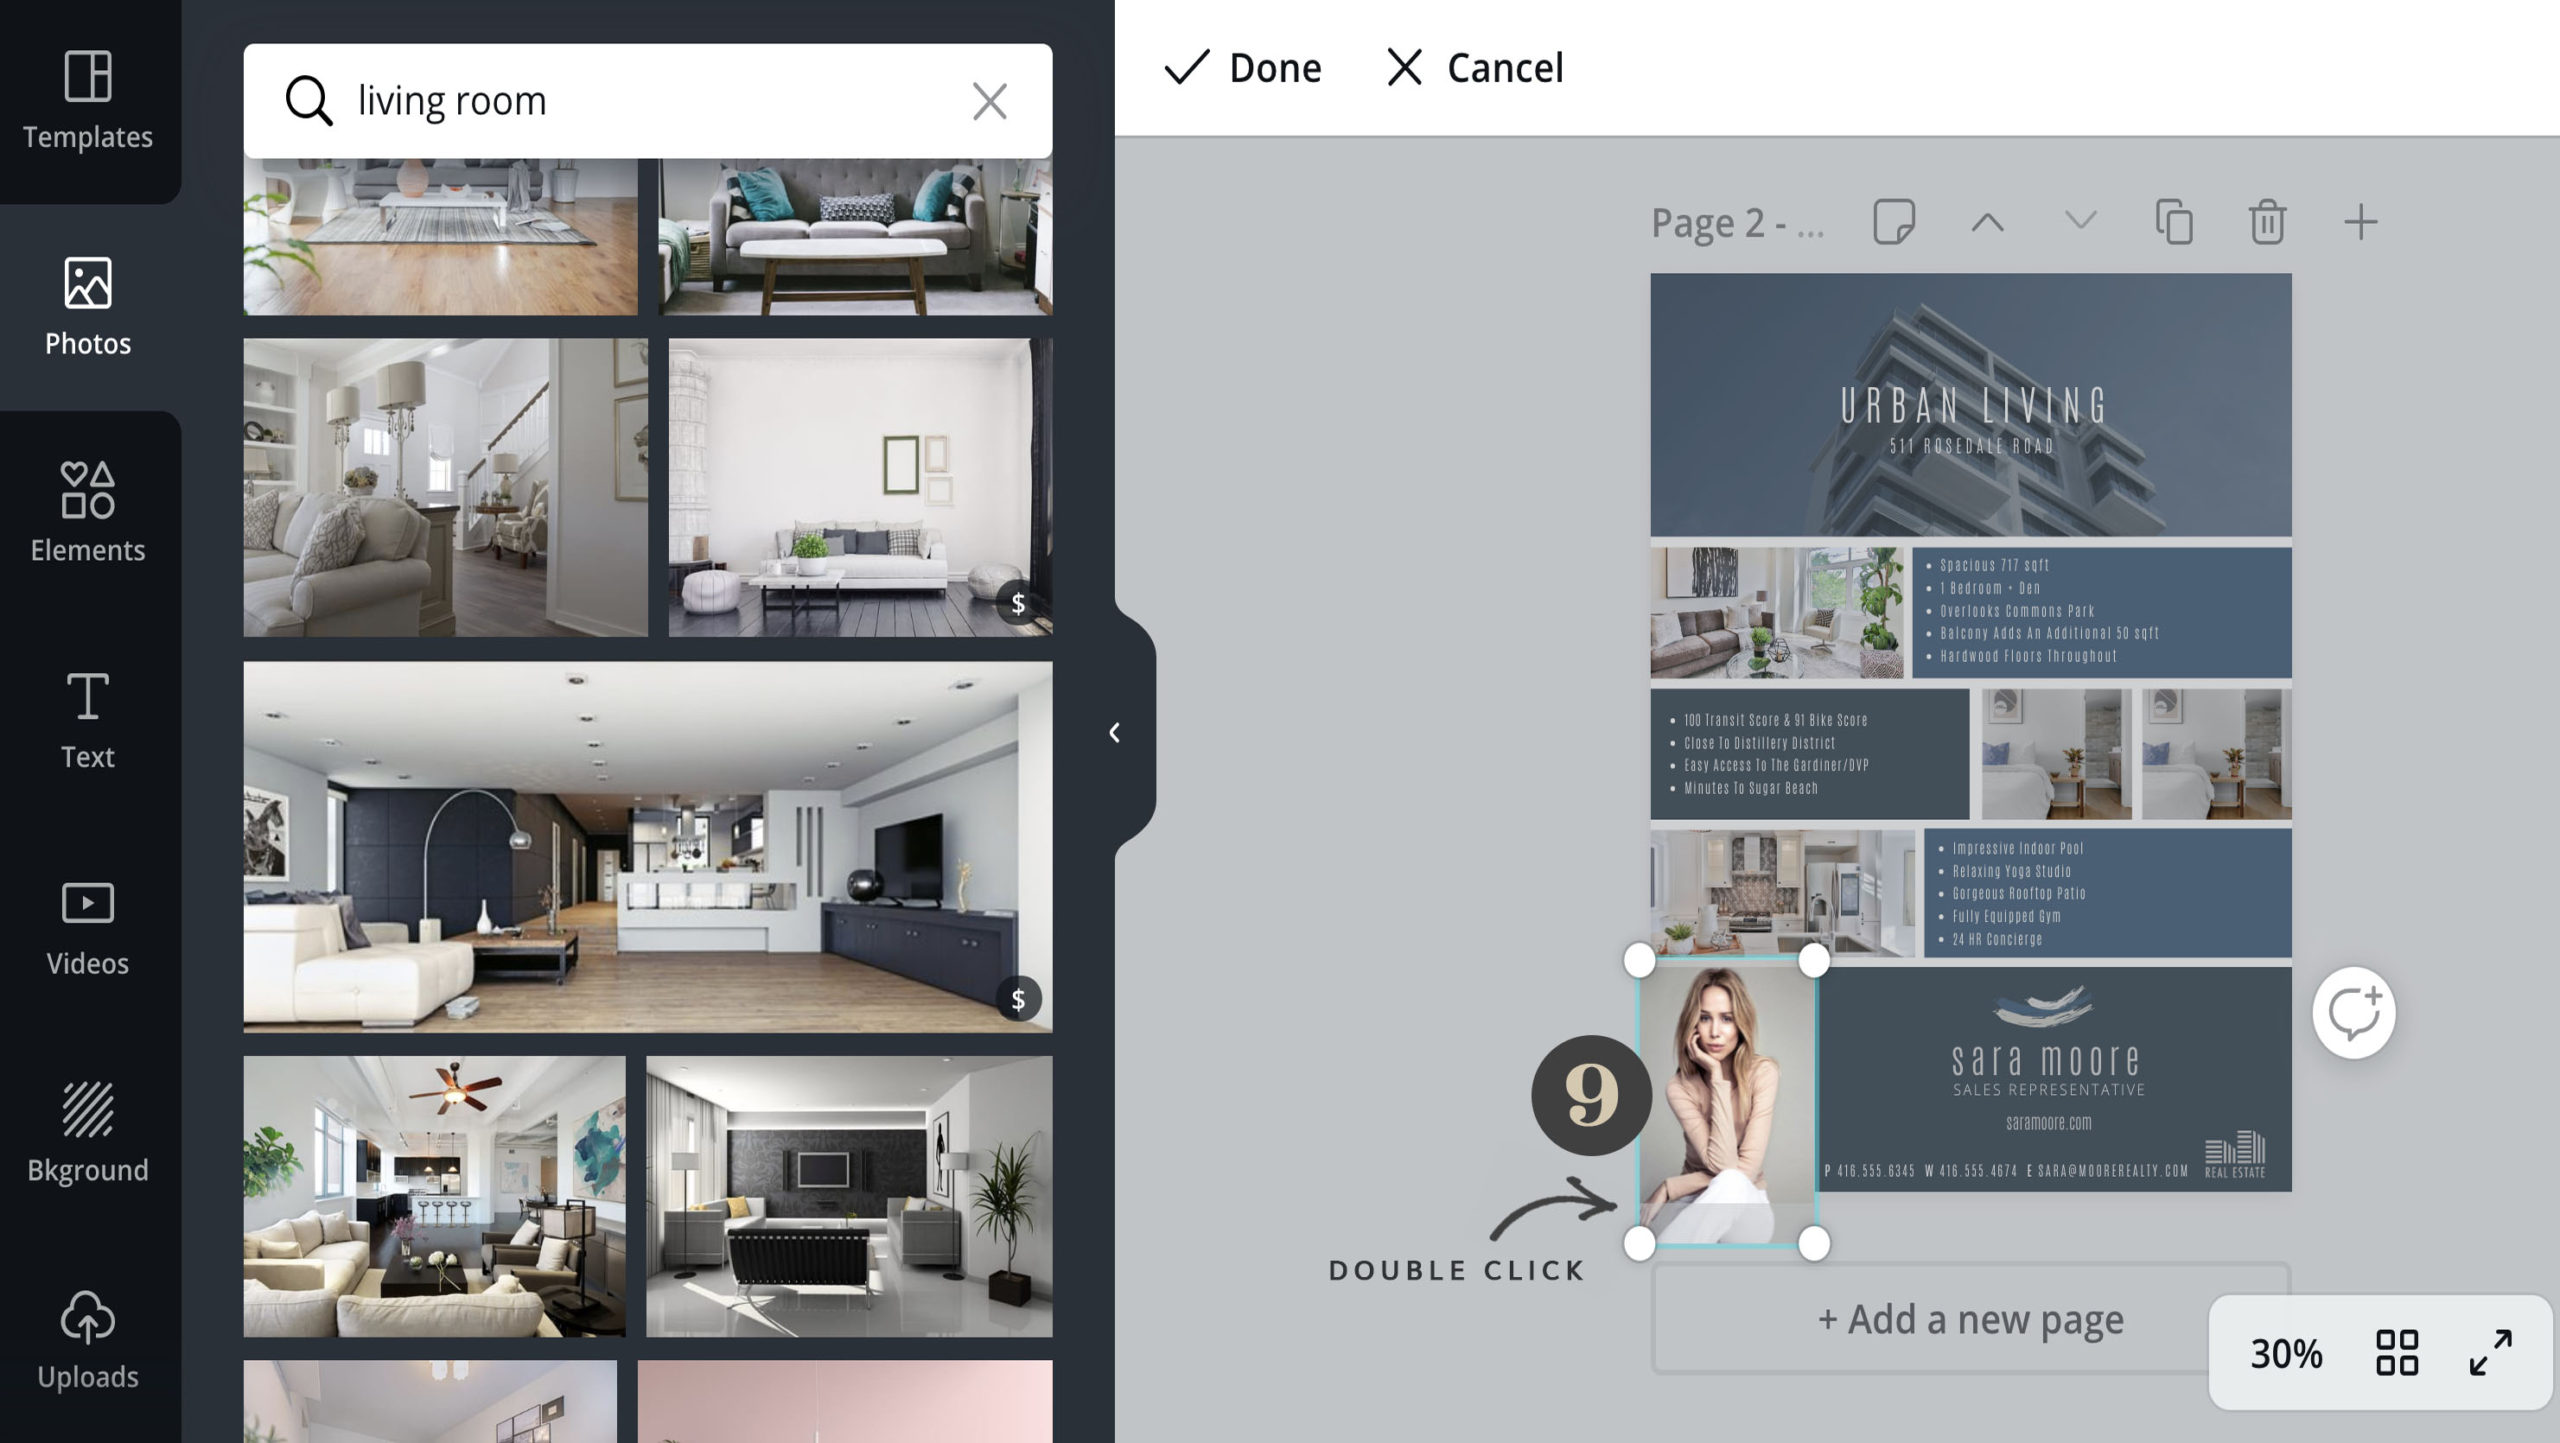
Upload your photo, your logo (make sure it’s a PNG or transparent background file) and brokerage info.
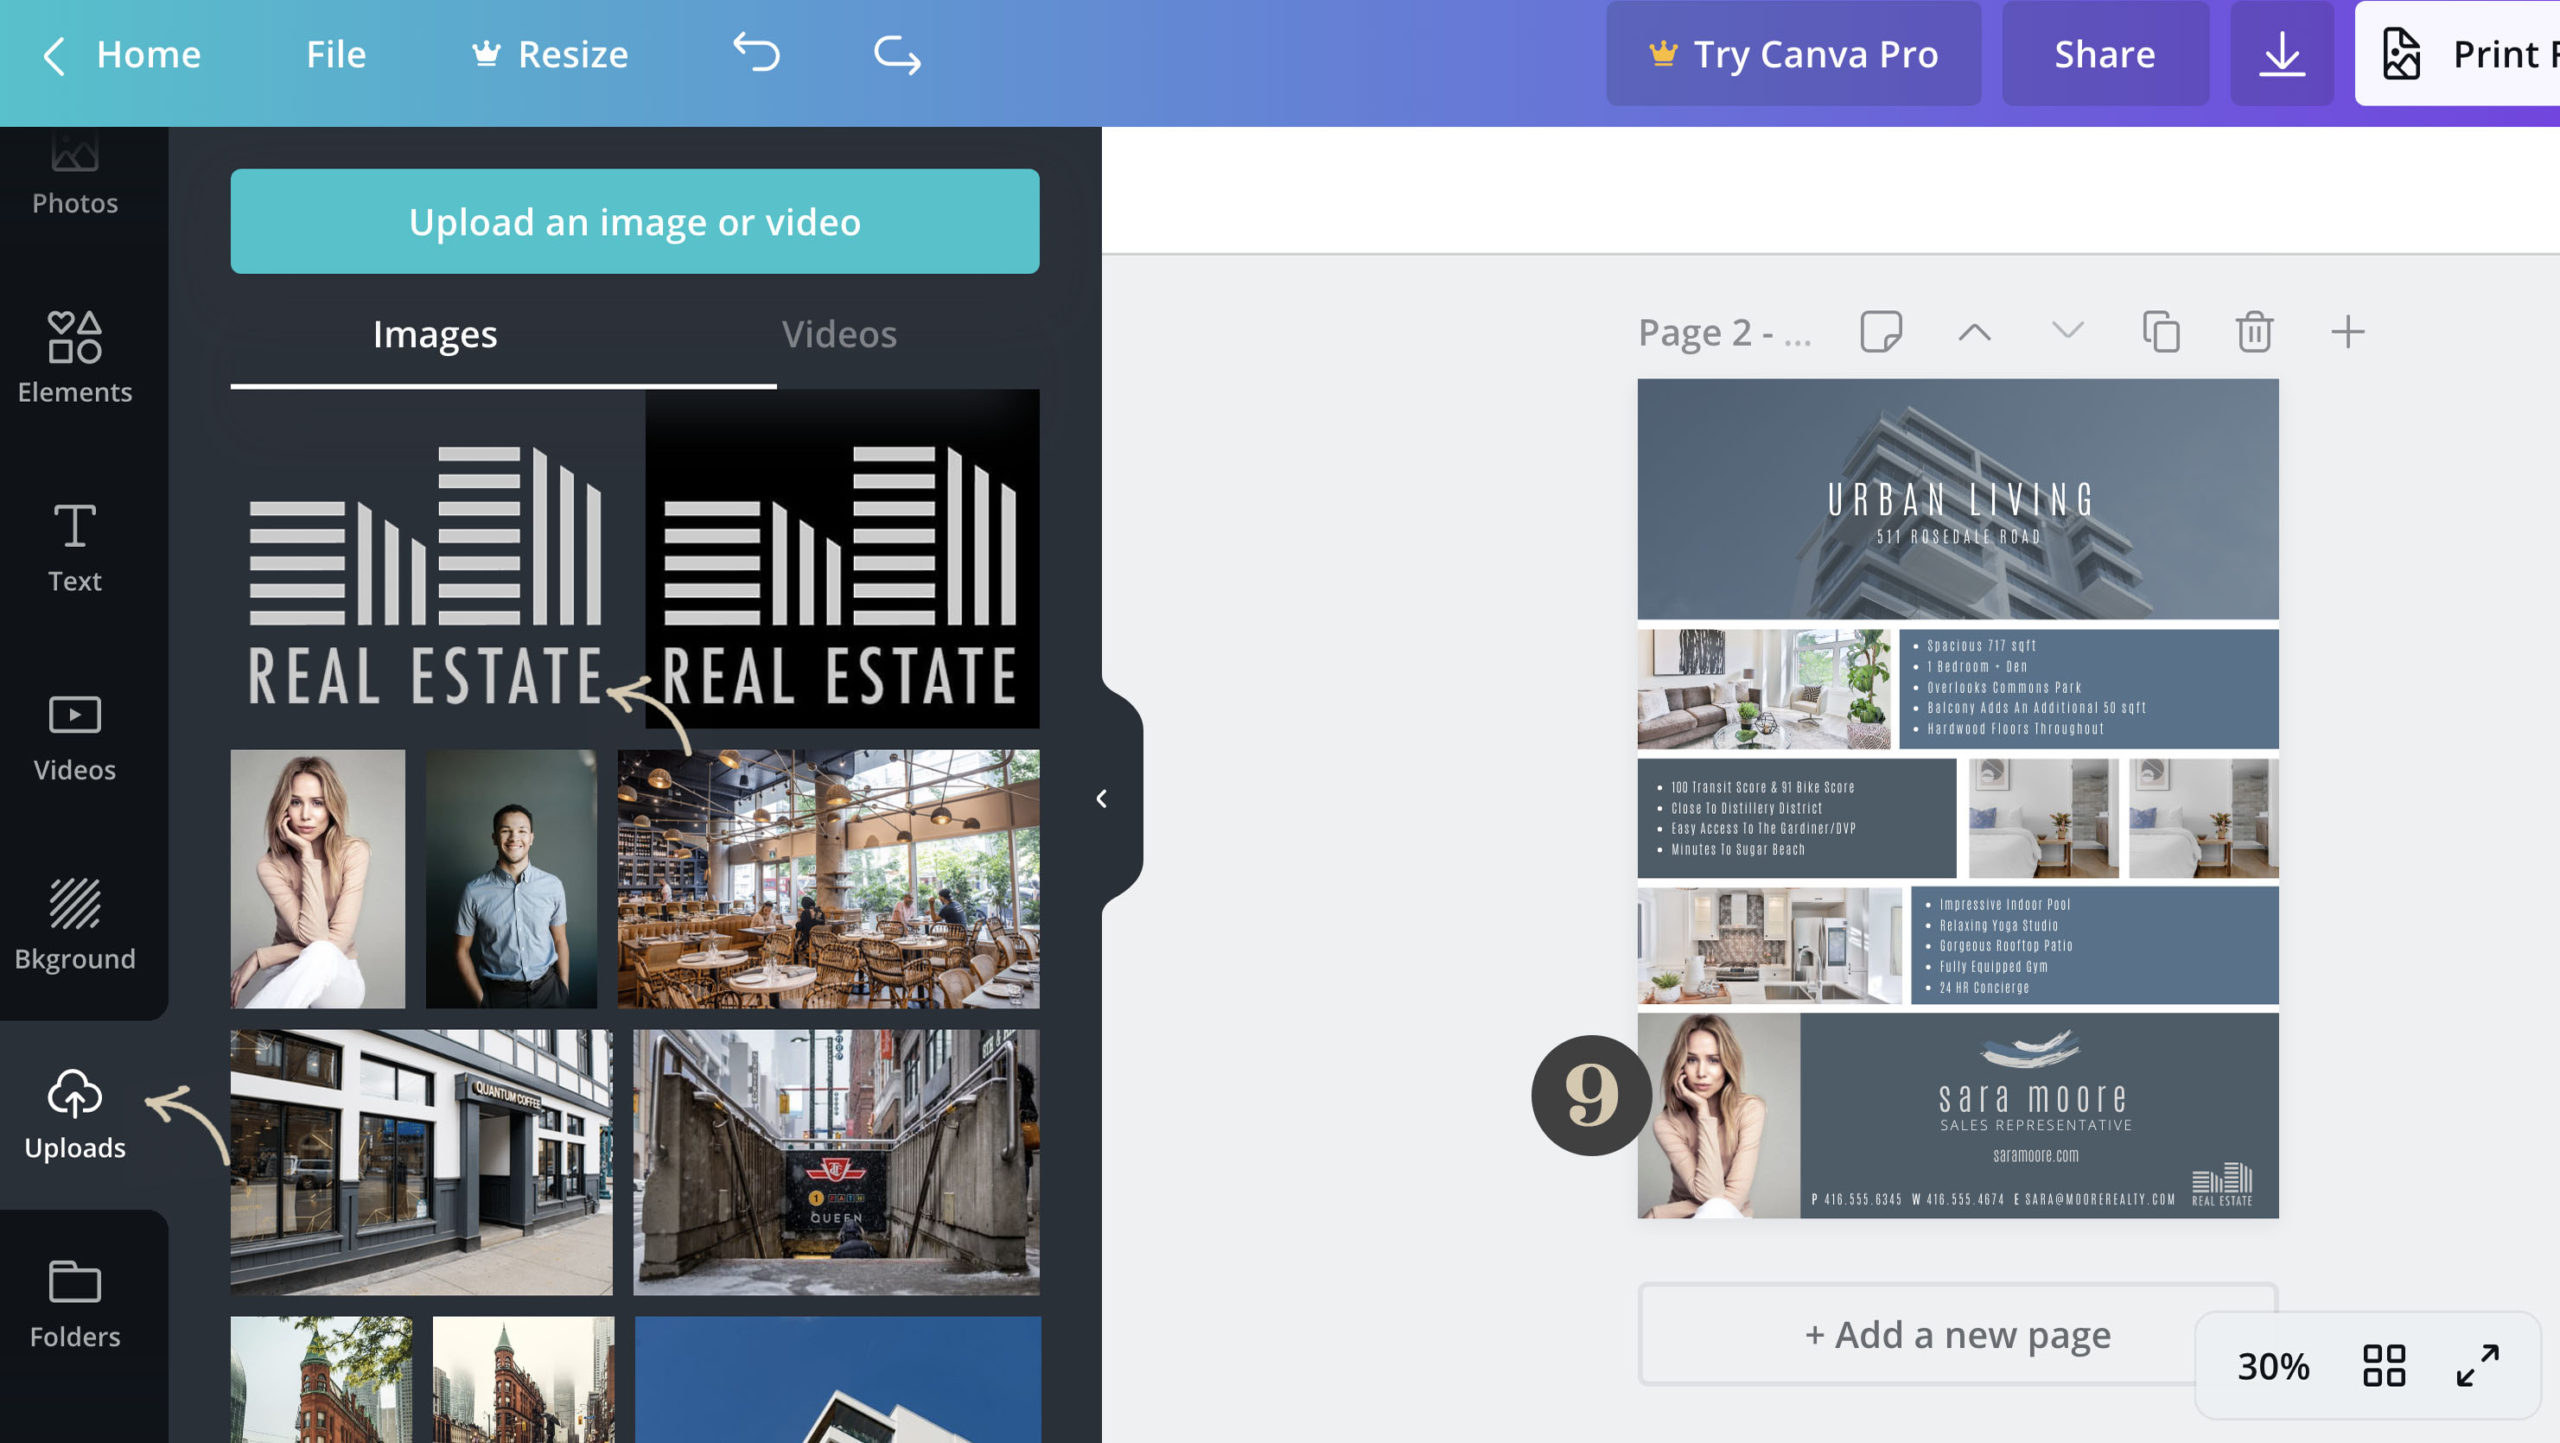
Drag and drop each element into image boxes. Single click element to move entire box or double click to element to move image placement within the box.
ten | DOWNLOAD
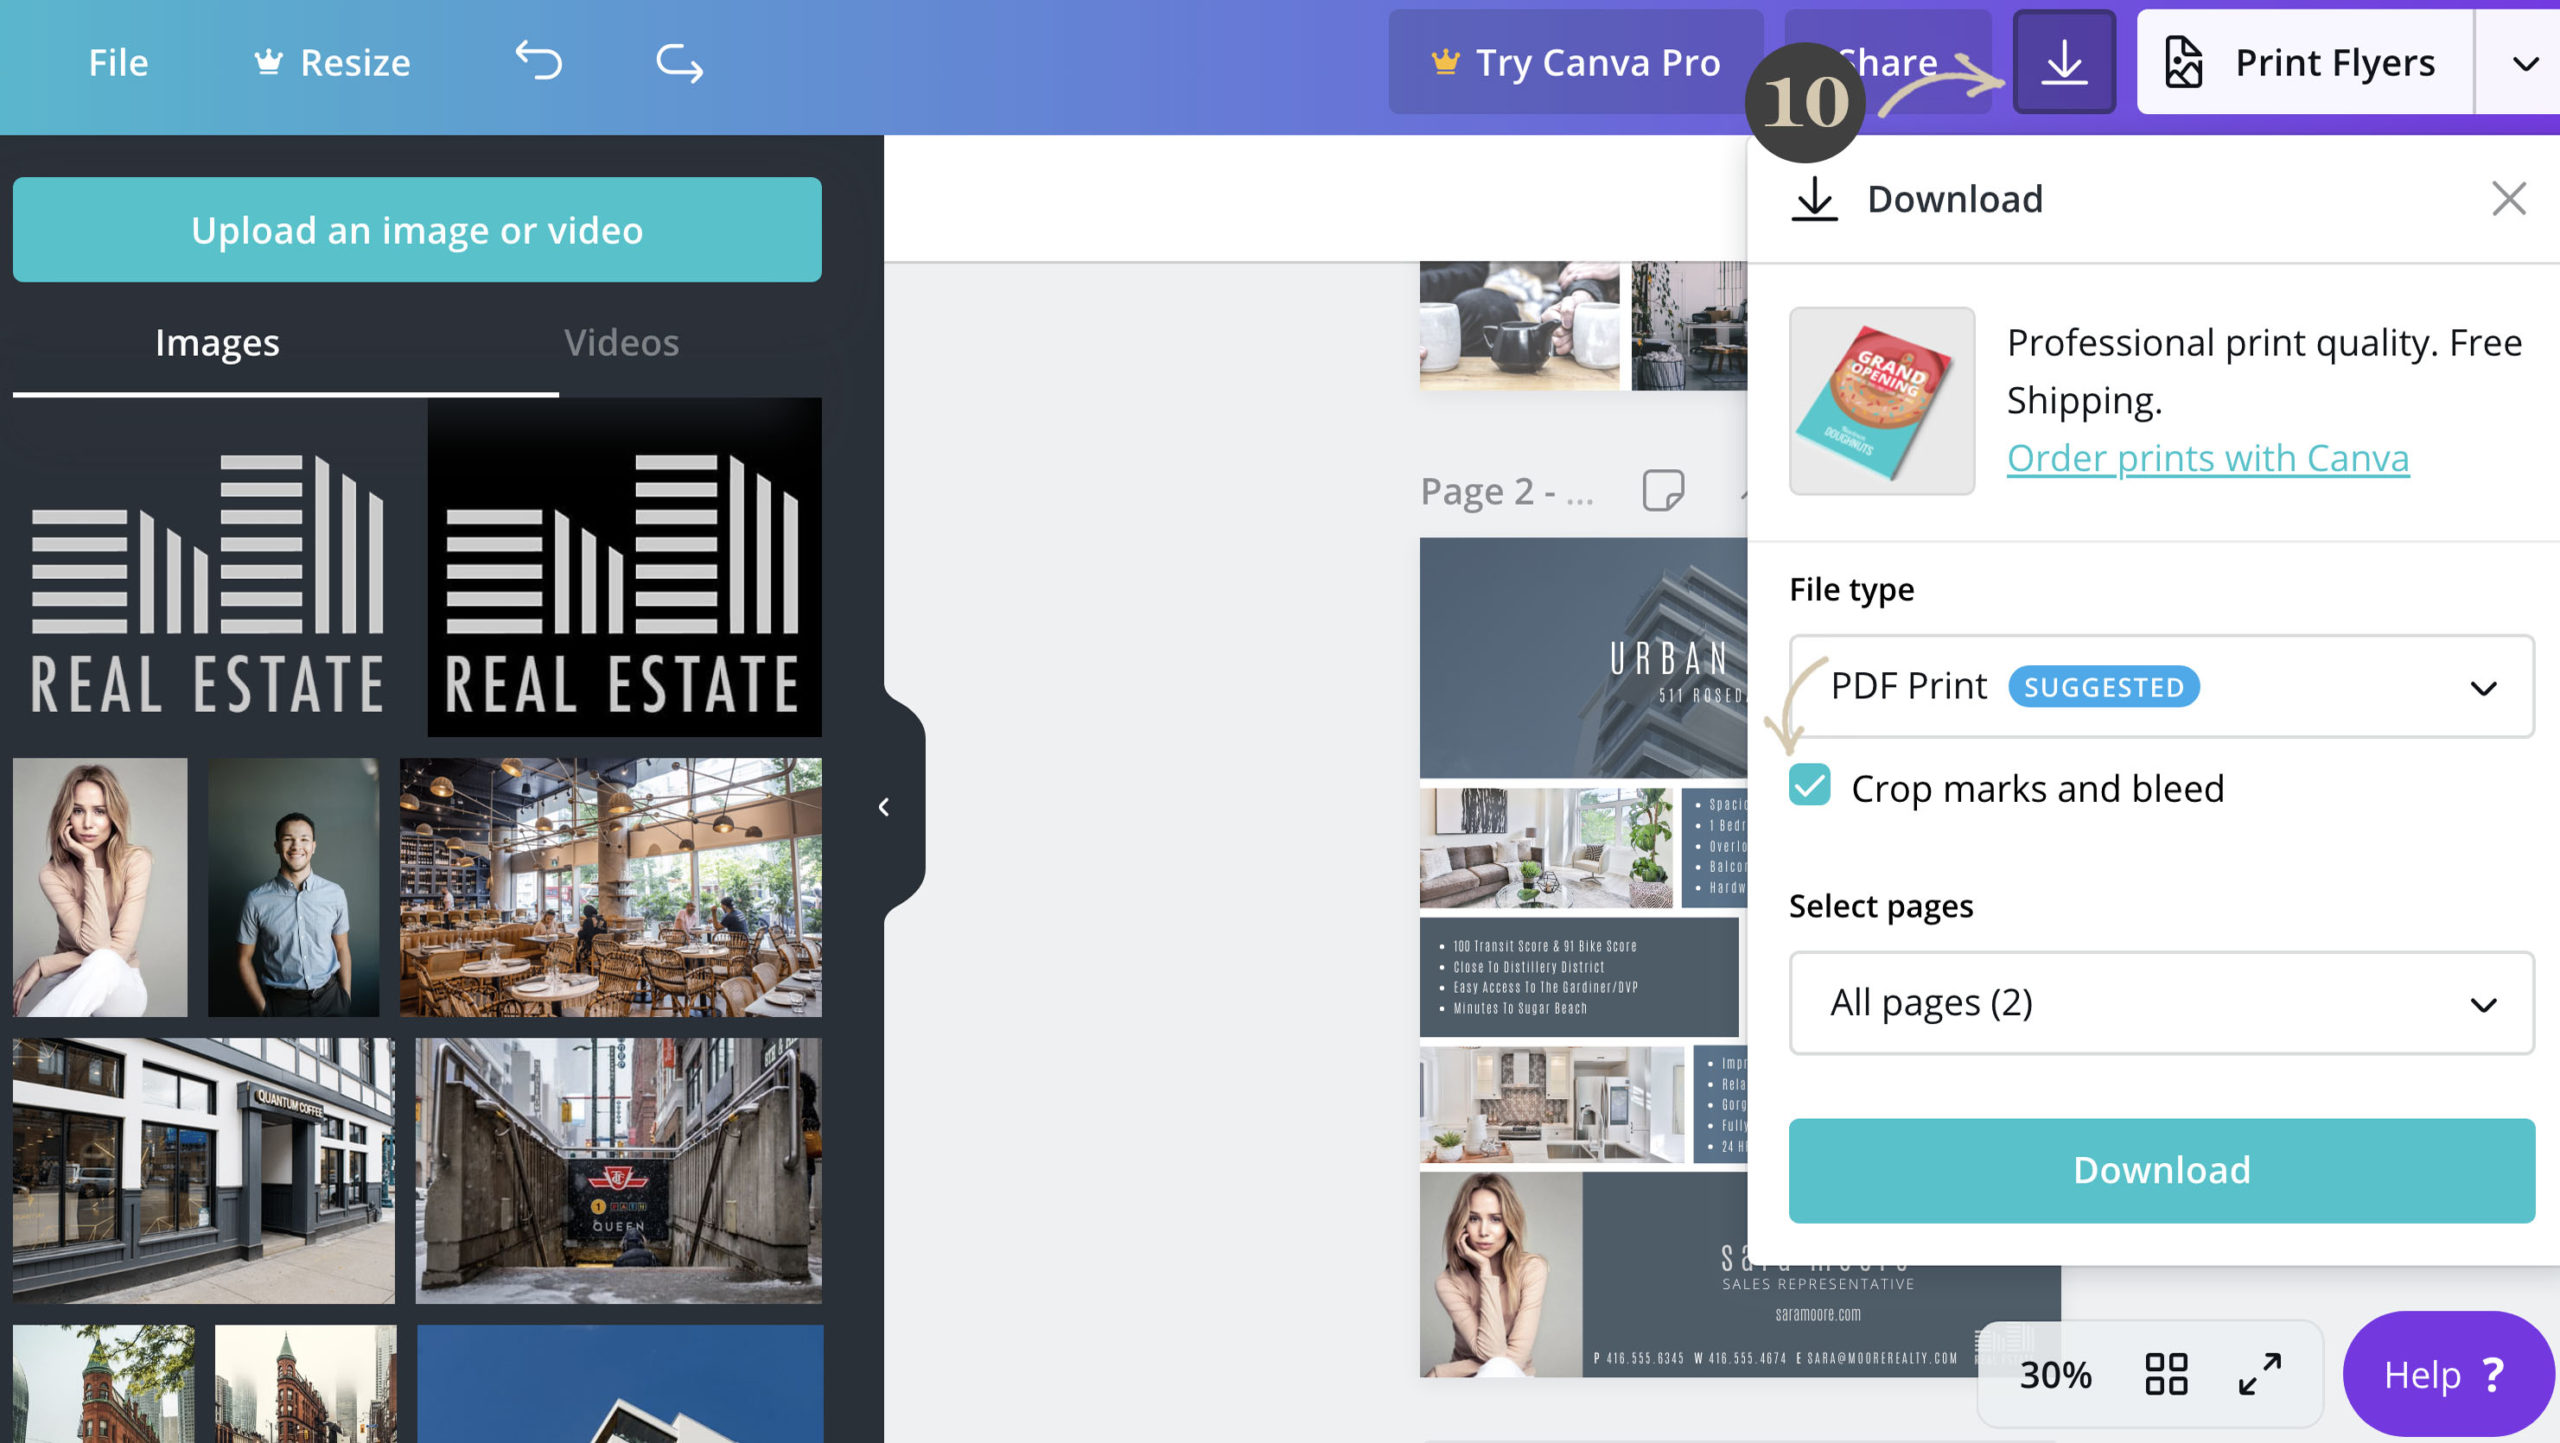
When you are done perfecting your work it’s time to download your design. Head over to the download button (arrow on top panel) and click download. If you are printing this on a home or office printer leave the crop marks unchecked, if you will be sending your file to be printed professionally make sure the “crop marks and bleed” checkbox is checked.
